
[Linux] Ubuntu minicom 사용하기
apt 패키지 minicom관련 포스팅 입니다.
기본 사용세팅 메모용
minicom
미니컴은 리눅스와 유닉스 계열 시스템을 위한 터미널 프로그램입니다.
저는 주로 USB-UART 모듈과 함께 사용합니다.
minicom 설치 및 기본 설정
apt 패키지 설치 및 기본 옵션을 설정합니다.
$ sudo apt-get install minicom
미니컴을 실행합니다.
$ sudo minicom
minicom: cannot open /dev/modem: No such file or directory
실행을 하는데 다음과 에러로그를 만납니다.
minicom: cannot open /dev/modem: No such file or directory
구글링을 해보면 -s 옵션을 사용하면 해결된다고 합니다.
$ sudo minicom --help
Usage: minicom [OPTION]... [configuration]
A terminal program for Linux and other unix-like systems.

  -b, --baudrate         : set baudrate (ignore the value from config)
  -D, --device           : set device name (ignore the value from config)
  -s, --setup            : enter setup mode
  -o, --noinit           : do not initialize modem & lockfiles at startup
  -m, --metakey          : use meta or alt key for commands
  -M, --metakey8         : use 8bit meta key for commands
  -l, --ansi             : literal; assume screen uses non IBM-PC character set
  -L, --iso              : don't assume screen uses ISO8859
  -w, --wrap             : Linewrap on
  -H, --displayhex       : display output in hex
  -z, --statline         : try to use terminal's status line
  -7, --7bit             : force 7bit mode
  -8, --8bit             : force 8bit mode
  -c, --color=on/off     : ANSI style color usage on or off
  -a, --attrib=on/off    : use reverse or highlight attributes on or off
  -t, --term=TERM        : override TERM environment variable
  -S, --script=SCRIPT    : run SCRIPT at startup
  -d, --dial=ENTRY       : dial ENTRY from the dialing directory
  -p, --ptty=TTYP        : connect to pseudo terminal
  -C, --capturefile=FILE : start capturing to FILE
  -F, --statlinefmt      : format of status line
  -R, --remotecharset    : character set of communication partner
  -v, --version          : output version information and exit
  -h, --help             : show help
  configuration          : configuration file to use

These options can also be specified in the MINICOM environment variable.
This variable is currently unset.
The configuration directory for the access file and the configurations
is compiled to /etc/minicom.

Report bugs to <minicom-devel@lists.alioth.debian.org>.
-s 옵션은 minicom을 setup mode로 실행하는 것을 확인할 수 있습니다.
-s 외에도 -D, -b 옵션도 자주 사용합니다.
셋업모드로 실행합니다.
$ sudo minicom -s
그러면 다음과 같은 화면이 나옵니다.
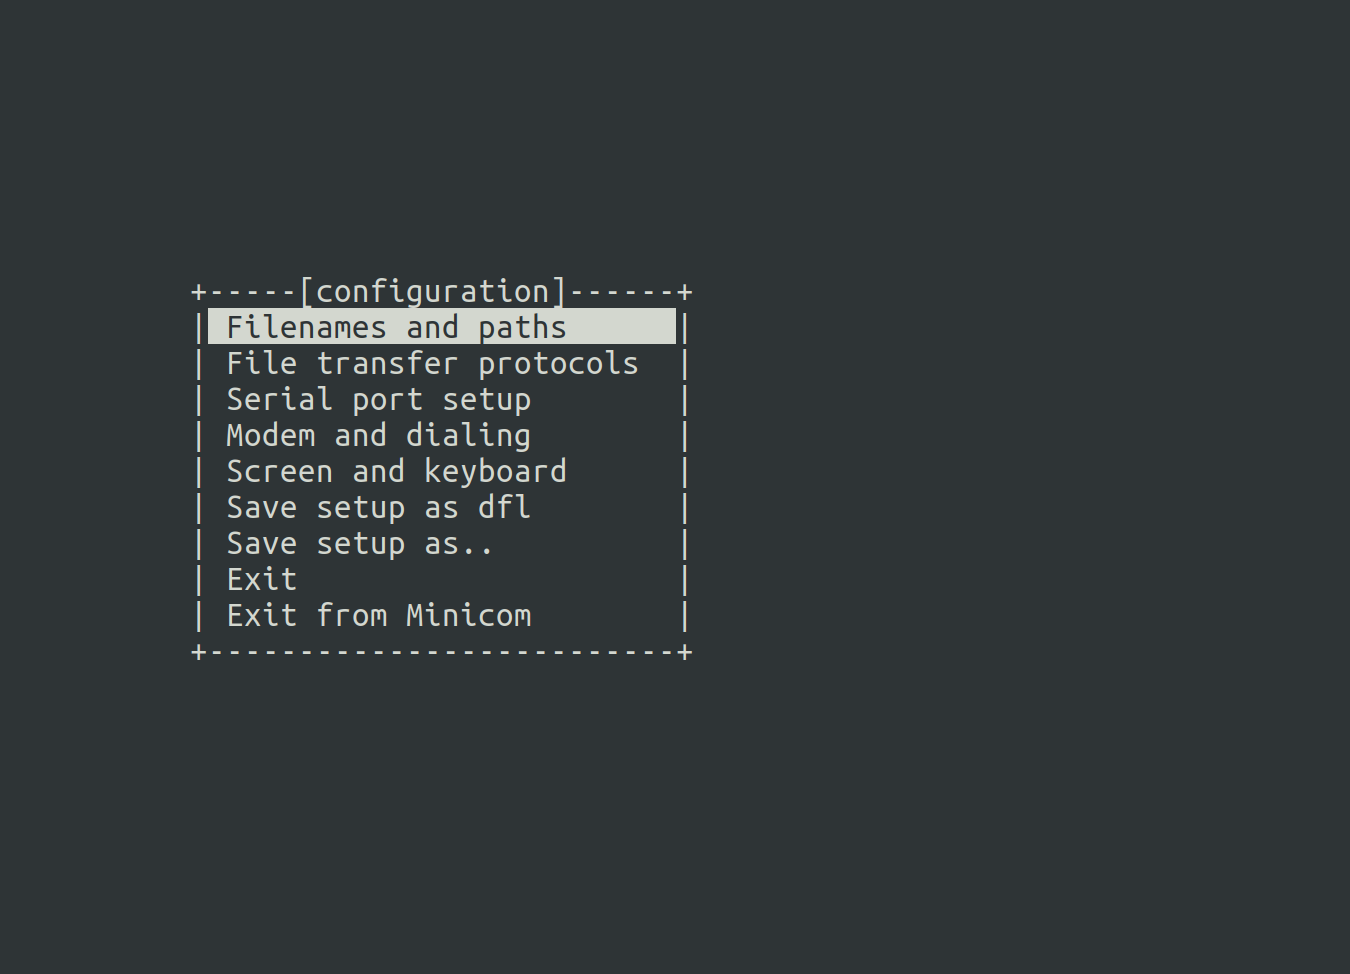
여기서 기본 세팅을 설정할 수 있습니다.
어차피 대부분은 옵션으로 바꿀 수 있기 때문에 저는 간단한 것만 바꿔줬습니다.
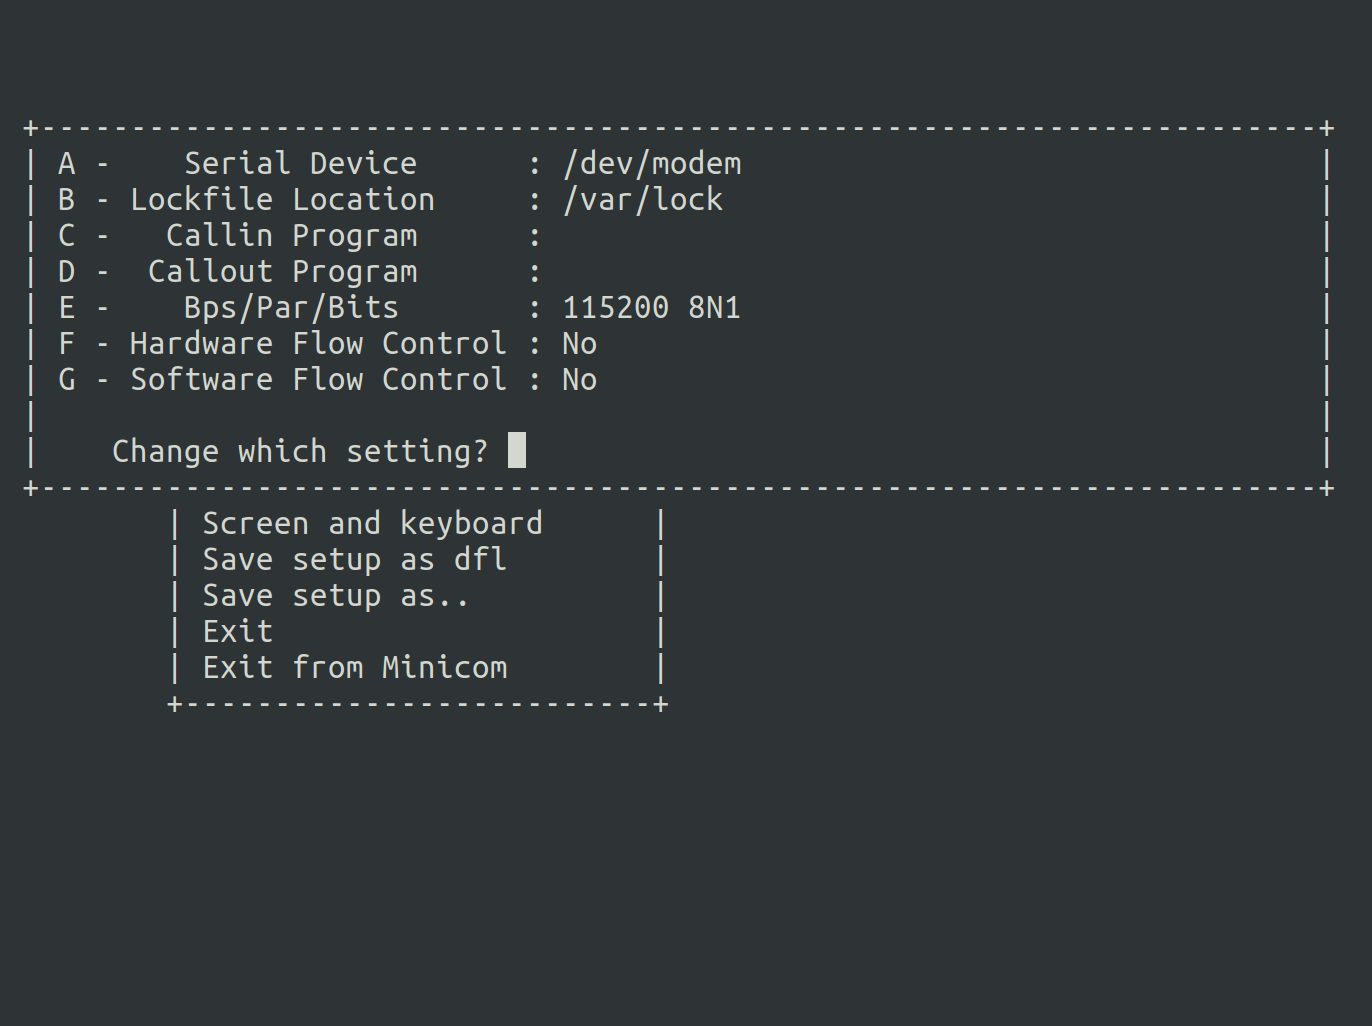
Serial port setup 에서 H/W, S/W Flow를 모두 비허용 하고,
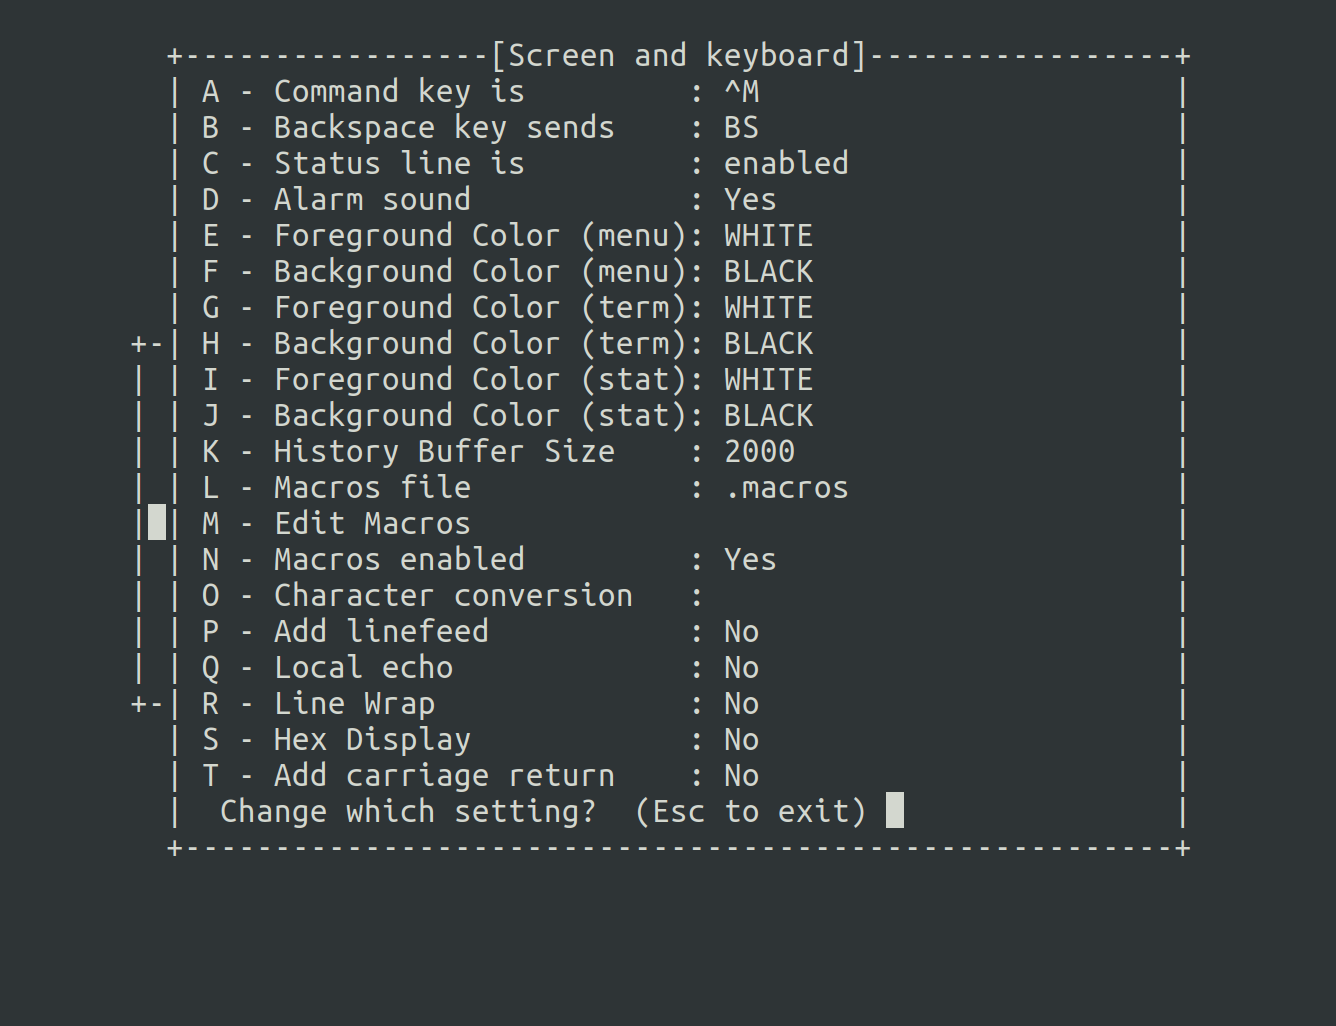
Screen and keyboard 에서 커맨드키를 Ctrl + M 으로 바꿔줬습니다.
Flow-Control은 UART에서 버퍼 max 상태 한정으로 동기식으로 통신 합니다. 대표적으로 RS232 가 있습니다.
H/W flow-control은 cts, rts핀을 사용한 경우에만 허용합니다.
S/W flow-control은 프로그램으로 구현하겠다는 뜻입니다.
해당 사항 없으니 모두 No로 세팅합니다.
커맨드 키는 본인이 원하는 키 아무거나 사용해도 됩니다.
저는 tmux의 prefix가 minicom 기본 커맨드 키와 겹쳐서 바꿨습니다.
이제 Save setup as dfl 으로 설정을 저장하고 빠져나옵니다.
minicom을 사용할 때 필요한 것은 연결 장치와 bitrate 입니다.
연결장치는 minicom/dev/modem</span>으로 되어있지만,
help 메세지를 보면 -D 옵션으로 장치를 정할 수 있습니다.
minicom 실행
저는 USB-UART 모듈을 사용 했습니다.
장치를 데스크탑 허브에 꽂았다 빼면서 해당 디바이스 노드가 무엇인지 확인합니다.
저는 /dev/ttyUSB0가 없어졌다 생겼다 합니다.
연결할 장치를 찾았고 원하는 bitrate를 정했으면 minicom을 사용해서 terminal을 엽니다.
bitrate를 115200으로 가정해 보겠습니다.
device: /dev/ttyUSB0
bitrate: 115200
$ sudo minicom -D /dev/ttyUSB0 -b 115200

연결에 성공한 화면입니다.
컨트롤 키 + z 조합으로 minicom summary를 열 수 있고 다양한 설정을 추가로 할 수 있습니다.

저는
W 키를 눌러 LineWrap을 on 하였습니다.
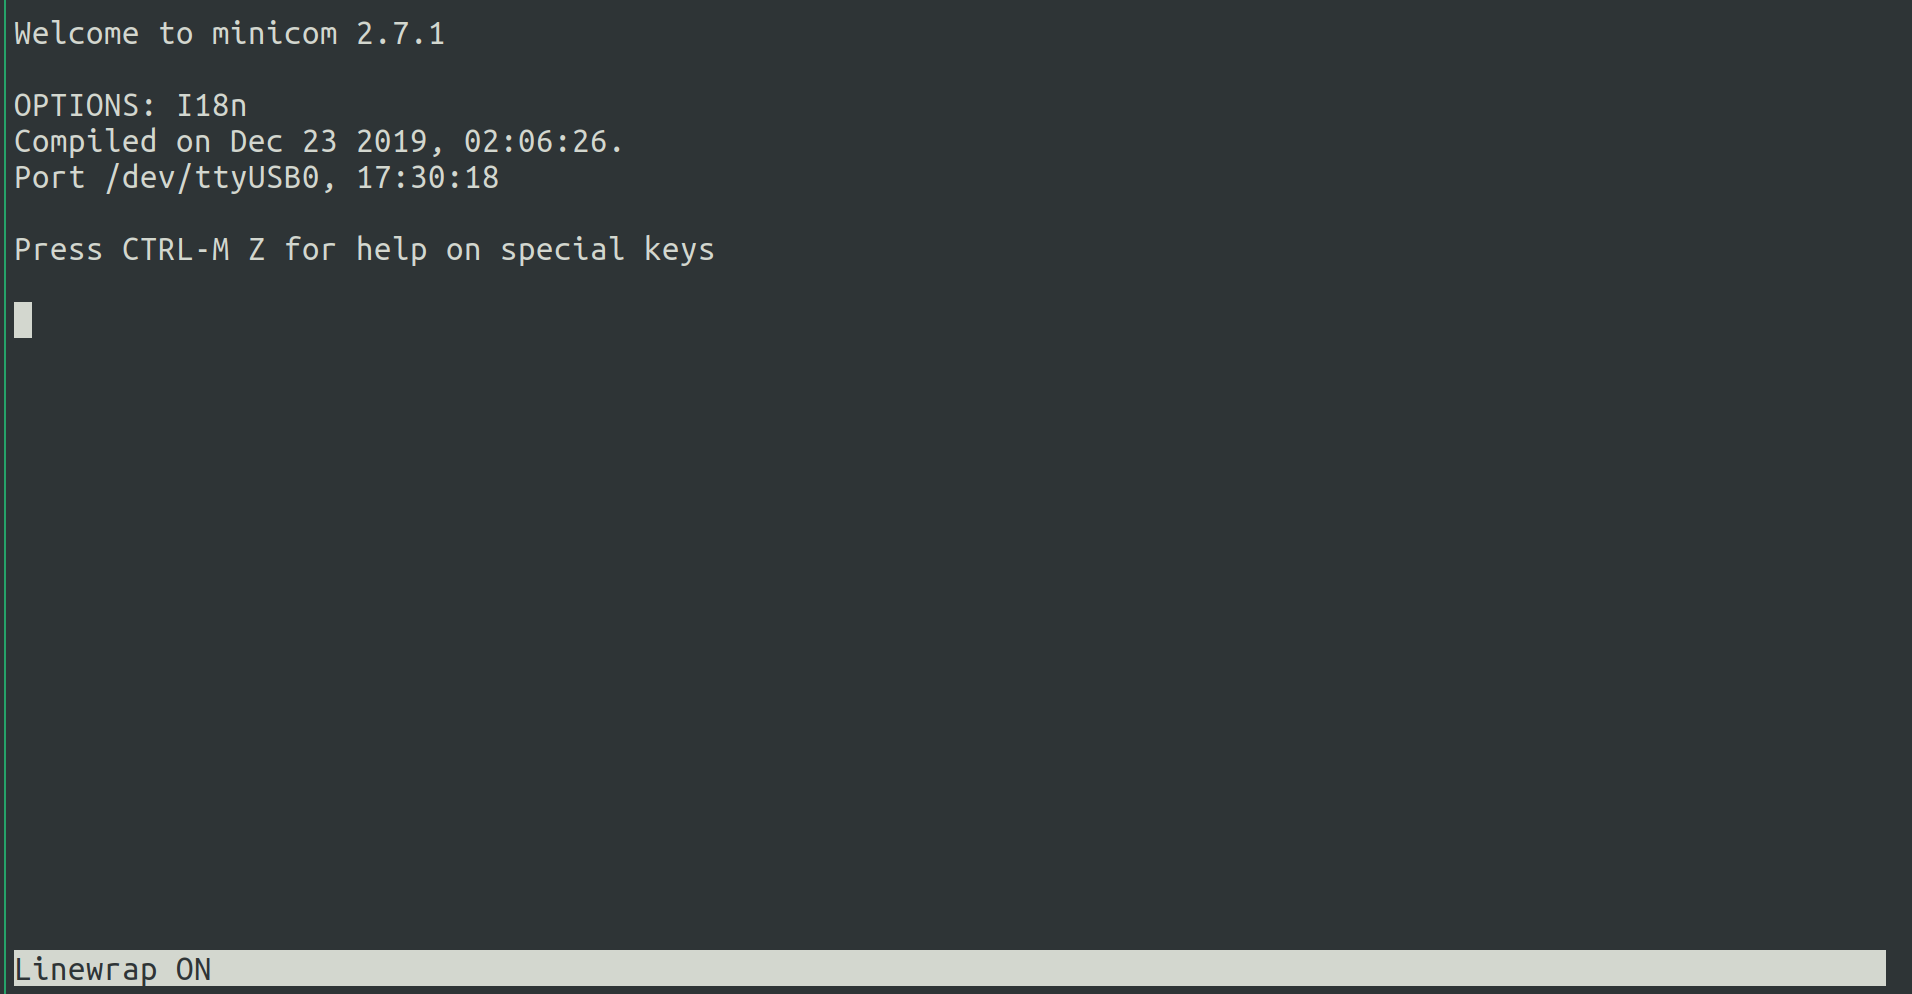
하단에 Linewrap ON 으로 표기되면 반영된 것입니다.
mincom을 실행할 때 옵션 -w 을 줘도 됩니다.
요약
- sudo apt-get install minicom
- sudo minicom -s
- Flow-Control을 모두 No로 설정하고 커맨드 키를 바꾼다. (Ctrl + M)
- minicom 과 -D, -b옵션으로 장치에 연결한다.
- 커맨드 키 + z 조합으로 LineWrap설정 ON하거나 장치 연결 시 -w 옵션을 추가한다.

Leave a comment